


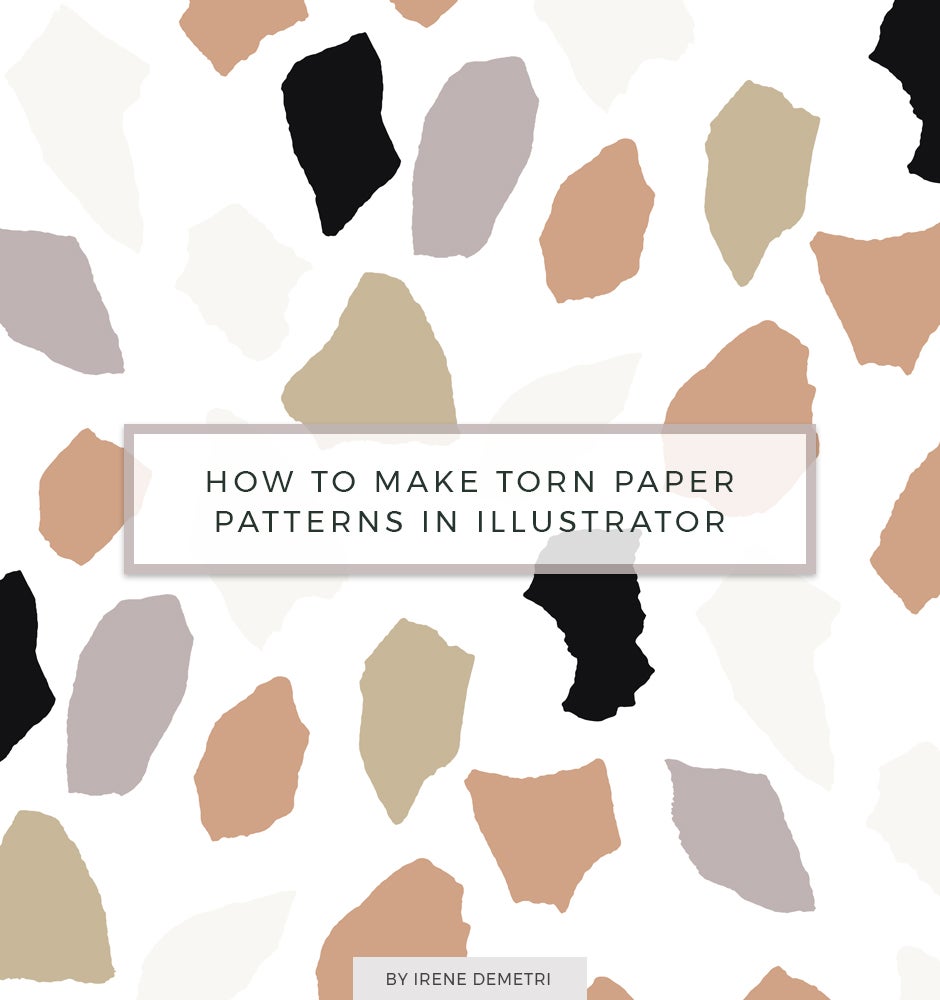
For those following my work, you may have noticed that I recently released a new set of vector patterns named Torn Paper Abstract Patterns. Now as the name suggests I created those from actual torn pieces of paper and I loved the process so much that I thought this would be a fun tutorial to share!
So if you would like to have a go at making your own seamless vector patterns or if you are just curious about the process that leads to a set like that, take a look at the steps below. I tried to document all the steps I followed to get to the final outcome as you see it below.
What you will need:
A few papers sized A4 or bigger, a scanner, Adobe Illustrator Software.

Step 1: Get messy and tear up some papers!
So this set started with some scrap papers I found around the house ('stolen' from my kids crafts box!).

Scrap pieces of paper from my kids
At this point the color of the paper you are going to use is not important. The pieces will be scanned and turned to vectors so you can edit the colors at a later step in the process. Just make sure you use anything other than white so that the shapes can be distinguished when you scan them.
I used scraps of bright pink, yellow and blue papers. One tip I could give you is to go for a thicker paper so you can get nice textured edges when you tear them.

Use thicker papers to get better texture around the edges
Now tear your papers into small pieces (I tried to create pieces of around 1-2 inches). For best results make sure you tear all their sides so that you don't have any straight cut sides.

Don't leave any straight cut sides on your pieces
What you should end up with is many little pieces, with as many sizes and shapes as you like!
Step 2: Scan your pieces of paper.
Now that you have your pieces ready it is time to scan them! You need to arrange them on your scanner so that no edges touch or overlap. What we basically need is to get the shapes scanned and turned into individual elements, so no pieces should touch each other.
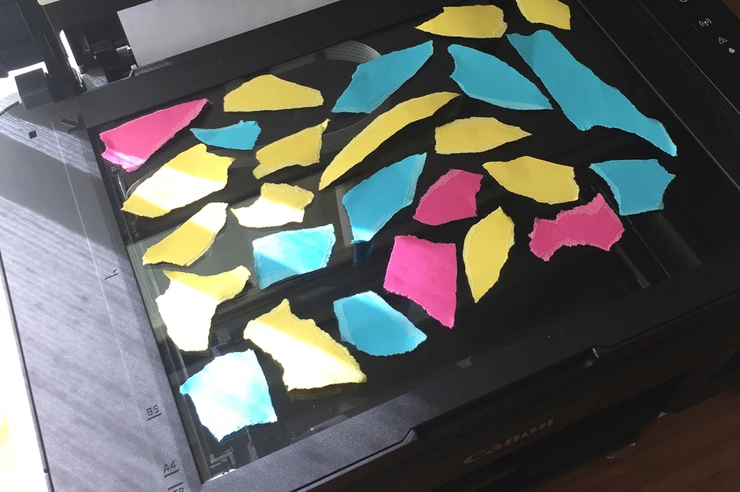
Arrange your pieces on your scanner
You will need to do this scanning process as many times as needed for you to scan all your pieces of paper. I think I probably scanned around 3-4 times to get about 50-70 shapes, but that is entirely up to you. You then save the scanned images in your computer.
Step 3: Turn your scanned images into vectors.
After I scanned the pieces of paper I got a few .jpg images that looked like this:

You now need to open Adobe Illustrator, go to File > Open and select one of the scanned images you created.

Open your scanned images in Illustrator
Go to Window > Image Trace to open your trace panel. Click on your image to select it and then check the preview check box in your Image Trace panel.

Preview Trace
On the Image Trace Panel, set your Mode to Black & White and then set the right settings for your image. I aimed at a high Threshold so that all my shapes are filled in black but still distinguished from one another. I also set a high Paths value (around 90%) as I wanted to keep a nice textured edge on my shapes. Finally check the Ignore White checkbox to only keep the black shapes once traced.
Then go to Object > Expand

Object > Expand
Check Object and Fill and click OK

Click OK
You will now see that your .jpg image is turned into vector shapes!
Go to Object > Ungroup to ungroup all your elements (you might need to to this twice to get everything ungrouped).

Ungroup your elements
Once all elements are ungrouped, then go ahead and delete anything other than your main shapes. As you can see in my examples there are some little spots left after tracing the image. Just select and delete them.

Delete unecessary elements
After cleaning around your shapes, you may want to zoom in closer and edit any shapes that may not look that great, like for example the edge seen below. I used the Delete Ancor Point Tool to delete some ancors and even out my shape. You can also use the Smooth Tool, but in this case I wanted to keep the jagged edges.

Work on all your shapes
So after you work on all your vector shapes and you are happy with them, transfer them all together into a new Illustrator file and let's make some patterns!

These are all my shapes together
Step 4: Create your Patterns.
I create all my patterns in Adobe Illustrator, I love the flexibility that vector pattern swatches give you when designing and working with them. The pattern maker feature in Illustrator is also very easy to work with so in this step I will walk you through my process of making Illustrator seamless vector patterns.
With this particular set (after I had all my shapes ready) I tested a couple of color palettes. I was aiming for either a nude/calm color palette or something bolder and brighter. So I narrowed my options down to two color groups in Illustrator to choose from.

Create Color Groups
If you want to create Color Groups in Illustrator (I go for around 5 colors maximum for my patterns), you can create shapes, color them with the colors you like, select them all and then go to your Swatches panel > click New Color Group (the folder icon at the bottom).

Name and Save your Color Group
Add a name to your Color Group and click OK. You have now added your color palette at your swatches panel and you can proceed to do that with as many color palettes as you like to test.
The great thing about adding color groups is that you can color your artwork and then go to Edit > Edit Colors > Recolor Artwork to swap between your color groups easily.

Color your Artwork

Swap between your Color Groups

After playing around with colors, I decided to go with the nude color palette and I was really happy with how it looked!
Now I started to select a few shapes, drag them to a clean artboard and start arranging them in small compositions (these will form the repeating tile of the patterns). You can now play with sizes, make some pieces larger/smaller, rotate them, whatever feels right to your eyes so that you get a balanced arrangement of your individual pieces of paper.

Example of one of my compositions
When you are happy with what you have created, select your group of items and go to Object > Pattern > Make

Pattern > Make
Illustrator will now take you to Pattern Edit Mode and it will automatically tile your pattern.

Pattern Edit Mode
In your Pattern Options Panel you see that the default Tile Type is Grid. Feel free to play around with the options until you find the best option for your pattern composition. Even if it is not perfect you can still work on it to finalize your pattern.
I went for the Brick by Row Tile Type in this case and then moved some of the pieces around to a desired outcome.

Name your Pattern and Save
Once you are ready, you can add a Name for your new pattern and click Done.
The pattern you created will now be saved in your Swatches Panel.
You can then move on to create another composition from torn paper pieces. For my set I also tried pieces of paper overlapping.

Again, select your composition and go to Object > Pattern > Make

In this case I want to show you that even when your tiled pattern doesn't look great after you tried all the Tile Type options, you can move your elements around, or copy paste in some extra items to cover any blank spots.

Cover any blank spots in your pattern
Once you click Done at the top, you will be taken back to your artboard and you can find your new pattern in your swatches panel.

If you create any shape and select your pattern swatch you can test how your pattern will look when applied on shapes.
So this was my process!
You will see in my pattern set (set of 20 patterns) I also added some extra elements, some small hand drawn dots and scribbled lines as I wanted to add more texture to my collection.
For those I followed the same process, I drew them on white paper, scanned them, traced them into vectors and then included them in my pattern compositions as I was creating this collection.

See the entire collection of these Torn Paper Abstract Patterns below plus some samples of them applied on mockups.
Please let me know if you have any questions on the process!
I hope this was helpful :)


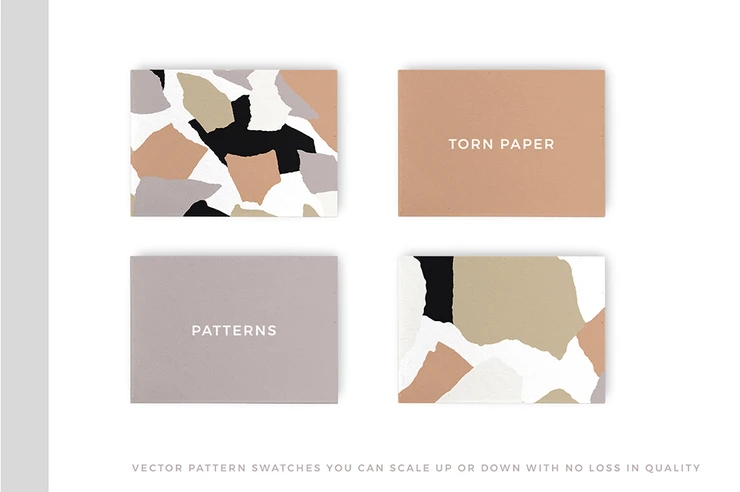
Torn Paper Abstract Patterns

Torn Paper Abstract Patterns

Torn Paper Abstract Patterns