


Working with Adobe Illustrator Pattern Swatches may be a bit challenging especially for someone just starting to use the Software.
This post is a guide with simple steps of how you can use Vector Pattern Swatches and how to apply them on your artwork within Adobe Illustrator.
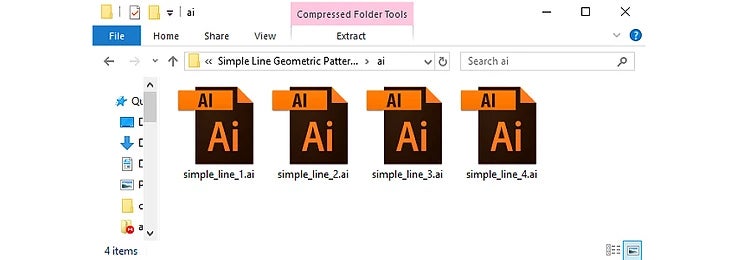
1. Extract the files containing the swatches

If the files you want to work with are zipped, unzip that folder. If you’re on a Mac, Double-Click the folder to unzip. If you’re on Windows, Right-Click on the folder and then click Extract All.
If you already have the .ai, files ready, move to step 2.
2. Load the Patterns in an Illustrator file
Create a new Illustrator file.
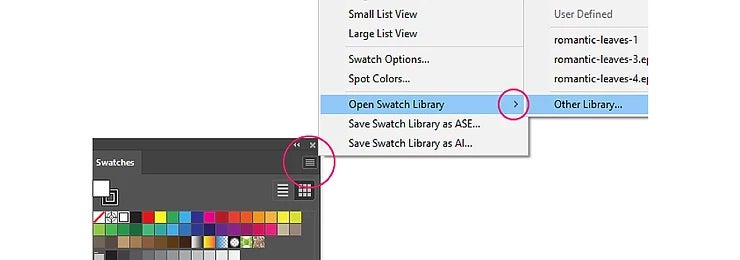
Open up your Swatches Panel.
They can be found by clicking Window > Swatches.
In your swatches fly-out menu click Open Swatch Library > Other Library
Then locate one of the .ai files you have just unzipped and click open.
(in the above example I have used files from my Simple Line Geometric Patterns)

That’s it! Your new patterns will now load in a new Swatches Tab within your file.
3. Applying the Patterns
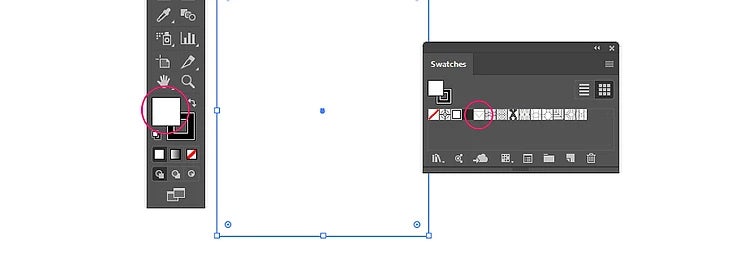
Create an area you would like to fill with a pattern.
Make sure the fill icon is active in the fill/stroke chips at the bottom of your toolbox.
Then select and click on the pattern you would like to apply from your swatches panel.

You can now click on any pattern in your panel to choose it and apply it to your currently selected object (area).
Changing the pattern is as easy as clicking on a different swatch :)